
How to Make Resin Rakhi at Home in India – Step-by-Step DIY Guide
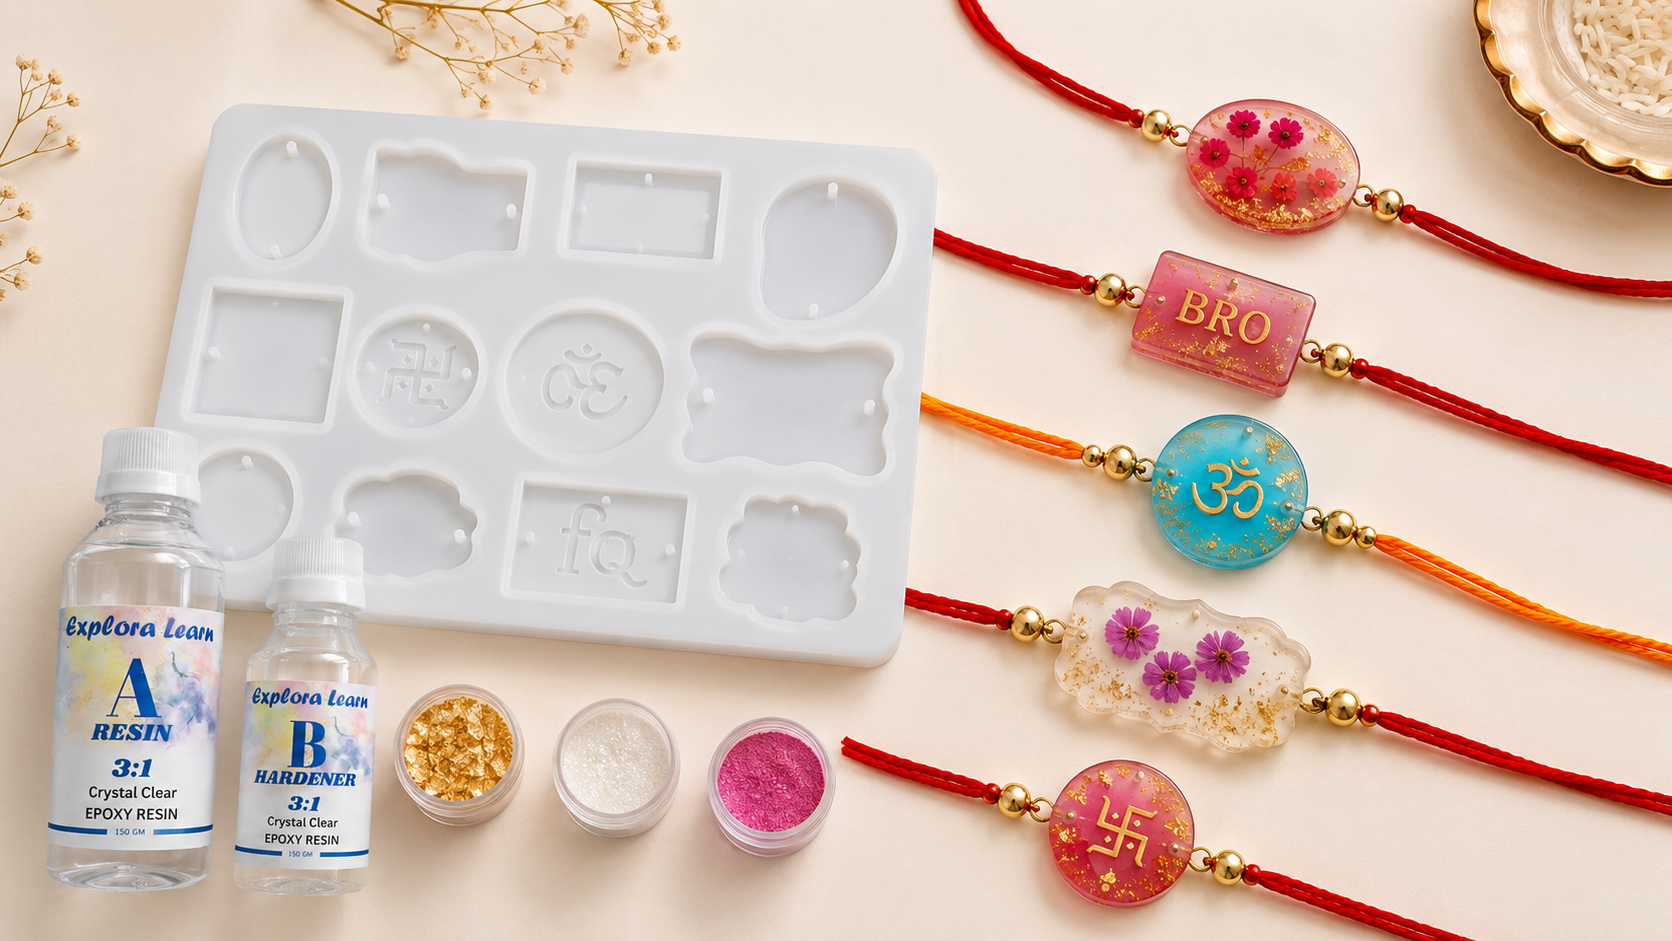
Tired of buying the same rakhi every year? This Raksha Bandhan, make your brother a one-of-a-kind resin rakhi that lasts forever. Resin rakhis are trending in India because they look luxurious, personalised and handmade — yet take under an hour to make. This guide shows you exactly how, step by step.
Why Resin Rakhis Are Trending in India
- Every piece is completely unique — no two resin rakhis look the same
- Fully customisable: choose your brother's favourite colours, add his initials, embed a photo
- Lasts for years — unlike traditional rakhis that fade or break within weeks
- Makes a stunning gift when paired with a handmade resin keychain or coaster
- Costs under ₹100 per rakhi when made at home with a kit
What You Need to Make Resin Rakhi
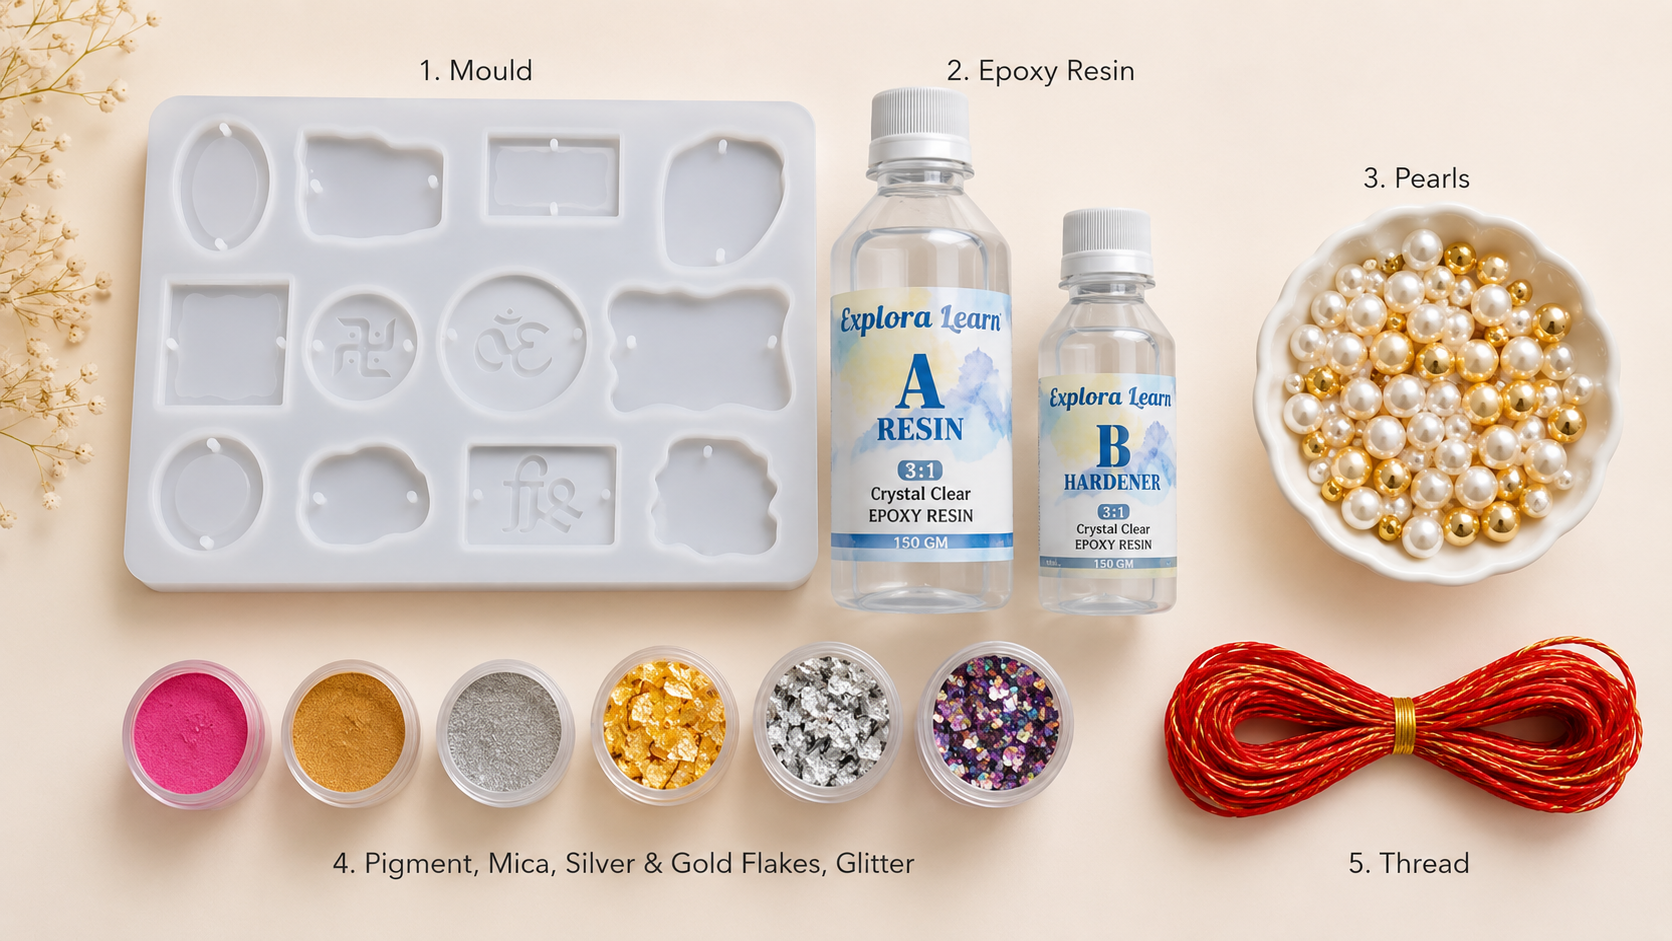
- UV resin or epoxy resin — UV resin is faster (cures in 5 minutes); epoxy takes 24 hours but gives a thicker, more durable result
- Silicone moulds — round, oval, heart or square shapes work best for rakhi pendants
- Rakhi thread or mauli — traditional red-gold thread, or a silk cord for a premium look
- Decorations — glitters, mica powder, dried flowers, small charms, gold foil flakes
- Alphabet moulds — to embed your brother's initial inside the pendant
- UV lamp — only needed if using UV resin (included in kits)
- Gloves and toothpick — for mixing and placing decorations
Our 195 Pcs UV + Epoxy Kit includes UV resin, epoxy resin, silicone moulds (including round and pendant shapes), glitters, mica powders, gold foil, alphabet moulds and a UV lamp — everything you need to make resin rakhis at home.
How to Make Resin Rakhi at Home – Step by Step
Choose your mould shape
Round, oval and hexagonal moulds make the most elegant rakhi pendants. Square moulds give a modern, geometric look. Choose a size that fits comfortably on a wrist — 2–3cm diameter is ideal. Our Jewellery Kit includes pendant moulds perfect for this.
Plan your design
Before pouring, decide on your colour and decorations. Popular resin rakhi designs include: gold and red (traditional festive look), blue and silver (modern and elegant), clear with dried flower (delicate botanical), brother's initial in glitter (personalised). See our What to Put Inside Resin guide for more ideas.
For UV resin (fastest method)
Pour UV resin directly into the mould — no mixing needed. Add a few drops of mica powder or glitter, place a small dried flower or charm, and stir gently with a toothpick. Cure under your UV lamp for 5 minutes. Done. Demould carefully. UV resin gives a beautiful clear, hard finish instantly.
For epoxy resin (most durable)
Mix epoxy resin and hardener in the exact 3:1 ratio — measure carefully. Stir slowly for 3–4 minutes until fully mixed. Add your chosen mica powder or pigment and stir again. Pour into the mould up to halfway. Add inclusions (flowers, charms, glitter). Top up with a second thin layer. Leave to cure for 24–48 hours. Read our Resin Process Guide for exact mixing instructions.
Embed your brother's initial (optional)
Use an alphabet mould to cast a small resin initial in a contrasting colour — for example, gold letter on a red background, or white letter on dark blue. Once cured, place the letter inside the main pendant mould before your final pour. This creates a layered, professional-looking piece.
Remove bubbles
Before curing, pass a toothpick gently across the surface to pop any bubbles. You can also use a lighter or heat gun held at least 15cm away — a quick pass over the surface bursts bubbles instantly. See our complete Bubble Removal Guide for more techniques.
Demould and finish
Once fully cured, flex the silicone mould gently and the pendant will pop out cleanly. Use a deburring tool (included in kits) to remove any sharp edges or flash. Sand the back lightly if needed with 400 grit sandpaper for a smooth finish.
Attach the rakhi thread
Drill a small hole at the top of the pendant using a pin heated over a flame, or use a jump ring (small metal loop). Thread through your mauli thread or silk cord. Tie the ends securely. Your resin rakhi is ready. Store in a small box or velvet pouch to present as a gift.
Resin Rakhi Design Ideas
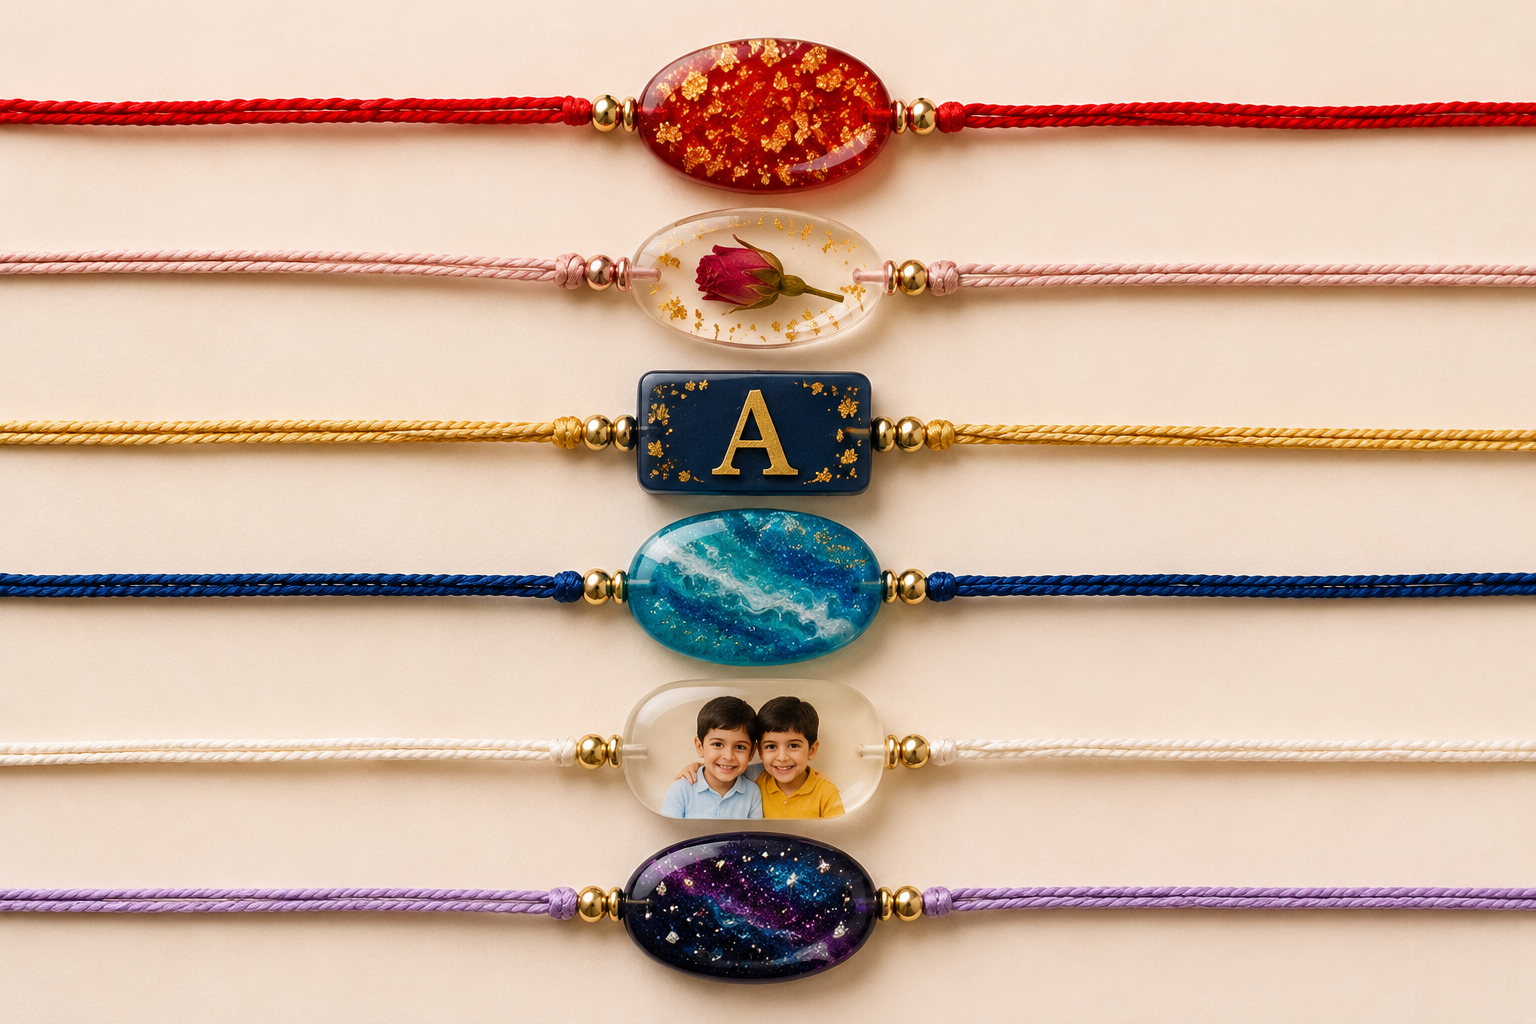
- Gold and red glitter rakhi — pour red pigment base, add gold glitter on top before curing. Classic festive look.
- Dried flower rakhi — clear resin pendant with a tiny dried rose or lavender sprig embedded inside. Elegant and unique.
- Initial pendant rakhi — your brother's first letter cast in gold resin, embedded in a contrasting colour background.
- Ocean blue rakhi — blue and teal pigment swirled with silver mica for a mesmerising ocean effect.
- Photo rakhi — print a tiny photo on thin paper, place inside clear resin before curing. A truly personal keepsake.
- Galaxy rakhi — dark blue or black base with silver and purple glitter swirled in. Dramatic and modern.
Making Multiple Rakhis – For Bhaiya and Jiju
Have more than one brother? Resin rakhis are easy to make in batches. A single pour of 25g UV resin fills 6–8 small pendant moulds. Make each one slightly different — same colour family but different design — for a cohesive but personalised set. You can also make a matching keychain using the same resin pour and remaining material. See our Resin Jewellery Guide for keychain-making instructions.
Gift a Resin Rakhi Making Kit
Looking for a unique Raksha Bandhan gift for your sister-in-law or a craft-loving friend? A resin art kit makes an extraordinary Rakhi gift — she can make her own jewellery, keychains and home decor long after the festival. Here are the best kit options by budget:
| Budget | Best Kit | What She Can Make |
|---|---|---|
| Under ₹599 | 10gm UV Starter Kit | Earrings, pendants, rakhis |
| ₹749–₹1,299 | UV Resin Mega Kit | Full jewellery set + rakhis for all brothers |
| ₹949–₹2,549 | 95 Pcs Complete Kit | Rakhis + coasters + keychains + earrings |
| Premium | 195 Pcs UV + Epoxy Kit | Everything — both UV and epoxy, all projects |
- Resin rakhis are unique, durable and cost under ₹100 per piece to make at home
- UV resin is the fastest method — cures in 5 minutes, no mixing required
- Epoxy resin gives a thicker, more durable pendant but takes 24–48 hours to cure
- Round and oval silicone pendant moulds work best for rakhi shapes
- One 25g UV resin fill makes 6–8 rakhis — enough for all your brothers
- Order your kit at least 10 days before Raksha Bandhan to allow time for making and curing
Raksha Bandhan 2025 is in August. Order at least 10–14 days before the date to allow time to make and cure your resin rakhis. Browse our complete range: Resin Art Kits India →
Frequently Asked Questions
Can I make resin rakhi without any experience?
Yes. UV resin rakhis require no mixing — just pour, add decorations and cure. Beginners can make a beautiful resin rakhi on their very first try. Our Complete Beginner Guide walks you through everything.
How long does it take to make a resin rakhi?
With UV resin: 20–30 minutes active time, 5 minutes curing. Total: under 1 hour. With epoxy resin: 20–30 minutes active time, 24–48 hours curing. Start epoxy rakhis at least 2 days before Raksha Bandhan.
Which resin is best for making rakhi — UV or epoxy?
UV resin is best for beginners making rakhi because it cures in 5 minutes with no mixing. Epoxy resin gives a slightly thicker, more durable pendant but requires careful mixing and a long curing time. See our complete comparison: UV Resin vs Epoxy Resin Guide.
What silicone mould should I use for rakhi?
Round moulds (3–4cm diameter) and oval pendant moulds work best for rakhi. Our jewellery kits include multiple pendant mould options in different shapes and sizes, all suitable for rakhi making.
Can I make resin rakhi for multiple brothers?
Absolutely. One 25g UV resin bottle fills 6–8 small pendant moulds — more than enough for multiple brothers. Make each one slightly different in colour or design to personalise for each person.
How much does it cost to make resin rakhi at home?
With a kit, the cost per rakhi is under ₹100. The kit itself (starting from ₹499 for our UV Starter Kit) is a one-time investment that lets you make rakhis for years and also create jewellery, coasters and keychains throughout the year.