Resin Art
Guide & Kits
Learn epoxy and UV resin from scratch — or shop our beginner kits. Everything in one place.
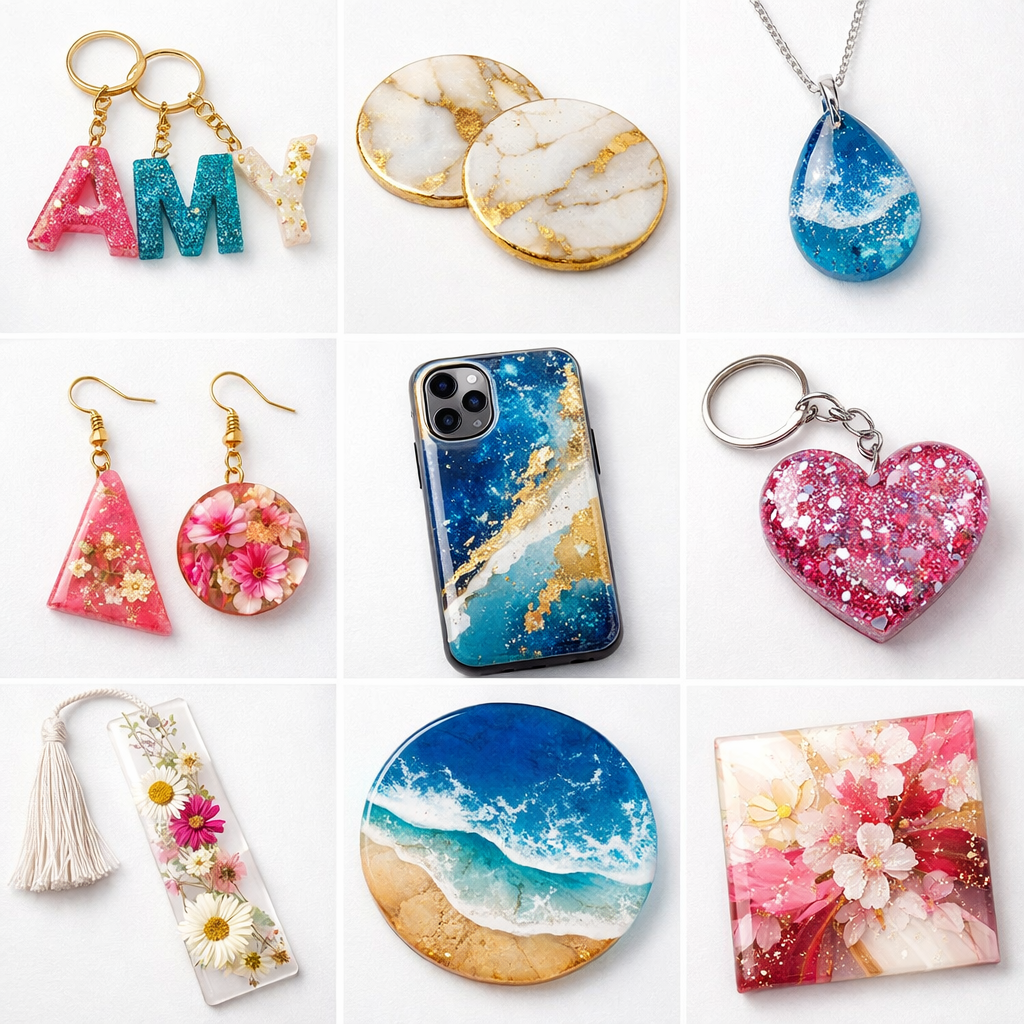
What Can You Create with Resin?
Resin art has become one of the most popular DIY creative activities. From small crafts to premium home décor, epoxy resin lets you create glossy, professional-looking pieces with ease.
Understanding Resin Ratios
The ratio of resin to hardener is the single most important thing to get right. Use the wrong ratio and your piece will stay sticky forever.
- Working time: 30 to 40 minutes
- Cures in approximately 24 hours
- Easy to measure and mix
- Working time: 40 to 45 minutes
- Cures in 24 to 48 hours
- Strong and durable finish
- Working time: up to 60 minutes
- Cures in approximately 48 hours
- Better clarity, less yellowing over time
Safety Precautions
Four simple rules. Takes 30 seconds to read, saves you every time.
How to Do Epoxy Resin Art at Home – Beginner Step-by-Step Guide
No prior experience needed. Just follow these simple steps and create your first resin art piece today.
Want to start resin art at home but not sure how? Don’t worry — this beginner-friendly guide will walk you through everything step by step. Whether you’re making resin jewellery, resin coasters, DIY resin crafts, or creative gifts, you can easily get started.
Resin art is fun, relaxing, and perfect for beginners who want to create something beautiful.
Epoxy resin art is a process where liquid resin is mixed with a hardener to create a glossy, strong, and clear finish. It is widely used for both creative and functional items.
Resin coasters and trays
Resin wall art and abstract paintings
Resin mould art and crafts
Decorative items and gifts
If you’re searching for how to start resin art at home, this guide is made for you.
Before you begin your DIY resin art, setting up your workspace properly is very important. A clean and safe setup helps you avoid mistakes and get better results.
Cover your table with a plastic sheet or newspaper
Keep the surface flat and level for even curing
Keep all tools ready before mixing
Always wear gloves while handling epoxy resin for safety.
Getting the resin mixing ratio right is the key to success. Even a small mistake can lead to sticky or uncured resin.
Example:
7.5 ml resin
2.5 ml hardener
First pour resin, then add hardener into the same cup
Do not add extra hardener to cure faster
Do not guess measurements
Wrong ratio = sticky resin or failed project
Pro Tip: Keep the room slightly warm to improve resin curing time.
Mixing may look simple, but it plays a big role in getting a clear epoxy resin finish. Patience here will give you better results.
Scrape the sides and bottom properly
Avoid fast stirring to reduce air bubbles in resin
Small bubbles are normal — they can be removed later.
Now comes the most exciting part — pouring your resin and bringing your design to life. This is where your creativity really shows.
Pour resin slowly over your mould or artwork
Spread evenly using a stick or flat tool
Resin is self-leveling, so it spreads smoothly on its own.
Working time: 40–50 minutes
Resin coasters
Resin jewellery
Resin mould art
DIY resin crafts
To get a smooth, glossy, and bubble-free resin finish, you need to remove air bubbles after pouring.
Remove dust or hair using a toothpick
Check your artwork under light for any imperfections
Cover your piece with a box or container to protect it from dust.
Resin needs time to set and harden properly. Do not rush this step if you want a strong and durable finish.
After 24–36 hours → touch dry
After 48 hours → ready to use
After 72 hours → fully cured
Always keep your artwork in a dust-free space while curing.
How to Avoid Bubbles in Resin
Bubbles are the most common beginner problem - but they are completely preventable with the right technique.
- Mixing the resin too fast traps air pockets throughout
- Working in a cold environment below 22 degrees
- Pouring a layer thicker than one-eighth of an inch
- Air trapped inside wood, dried flowers, or other embeds
- Use a torch or heat gun right after pouring - bubbles pop instantly
- Work at 24 to 30 degrees for better resin flow and clarity
- Pour in thin layers with a 3 to 5 hour gap between each
- Stir slowly and scrape the sides and bottom thoroughly
Frequently Asked Questions
Answers to the most common beginner questions about resin art.
- Resin jewellery - earrings, pendants, rings
- Resin coasters and decorative trays
- Resin wall art and abstract paintings
- Resin mould crafts and keychains
- DIY home decor and handmade gifts
- Always wear gloves when handling resin
- Work in a well-ventilated area near an open window
- Avoid direct skin contact with uncured resin
- Follow the instructions included in your kit
- Incorrect mixing ratio - this is the most frequent reason
- Not mixing long enough or thoroughly enough
- Room temperature too low - resin needs warmth to cure properly
- Not waiting the full 48 hours before touching or demoulding
- 3 to 5 hours - resin enters the sticky gel stage
- 24 hours - touch dry on the surface
- 48 hours - ready to use and safe to demould
- 72 hours - fully cured and maximum hardness
- Use a torch or heat gun gently right after pouring - bubbles pop immediately
- Mix resin slowly for 3 to 5 minutes to avoid introducing air during stirring
- Work in a warm environment at 24 to 30 degrees
- Pour in thin layers, never more than one-eighth of an inch at once
- Resin keychains - fastest to make and great for first-time practice
- Resin coasters - beginner-friendly and very popular as gifts
- Resin earrings and jewellery - use small moulds, requires very little material
- Bookmarks and small mould designs
- Measuring and mixing cups - included in your kit
- Stir sticks - included in your kit
- Gloves - included in your kit
- Silicone moulds - included in your kit
- Torch or heat gun - optional but highly recommended for removing bubbles
Start Your
Resin Journey
Today
Everything you need is in one box. Delivered to your door, anywhere in India.
UV Resin Art for Beginners – Quick & Easy Step-by-Step Guide
Want to start UV resin art at home and create beautiful designs in minutes? No experience needed.
Unlike epoxy resin, UV resin is fast, easy, and requires no mixing, making it perfect for beginners, kids (with supervision), and DIY lovers.
Create stunning resin jewellery, charms, and crafts in just minutes.
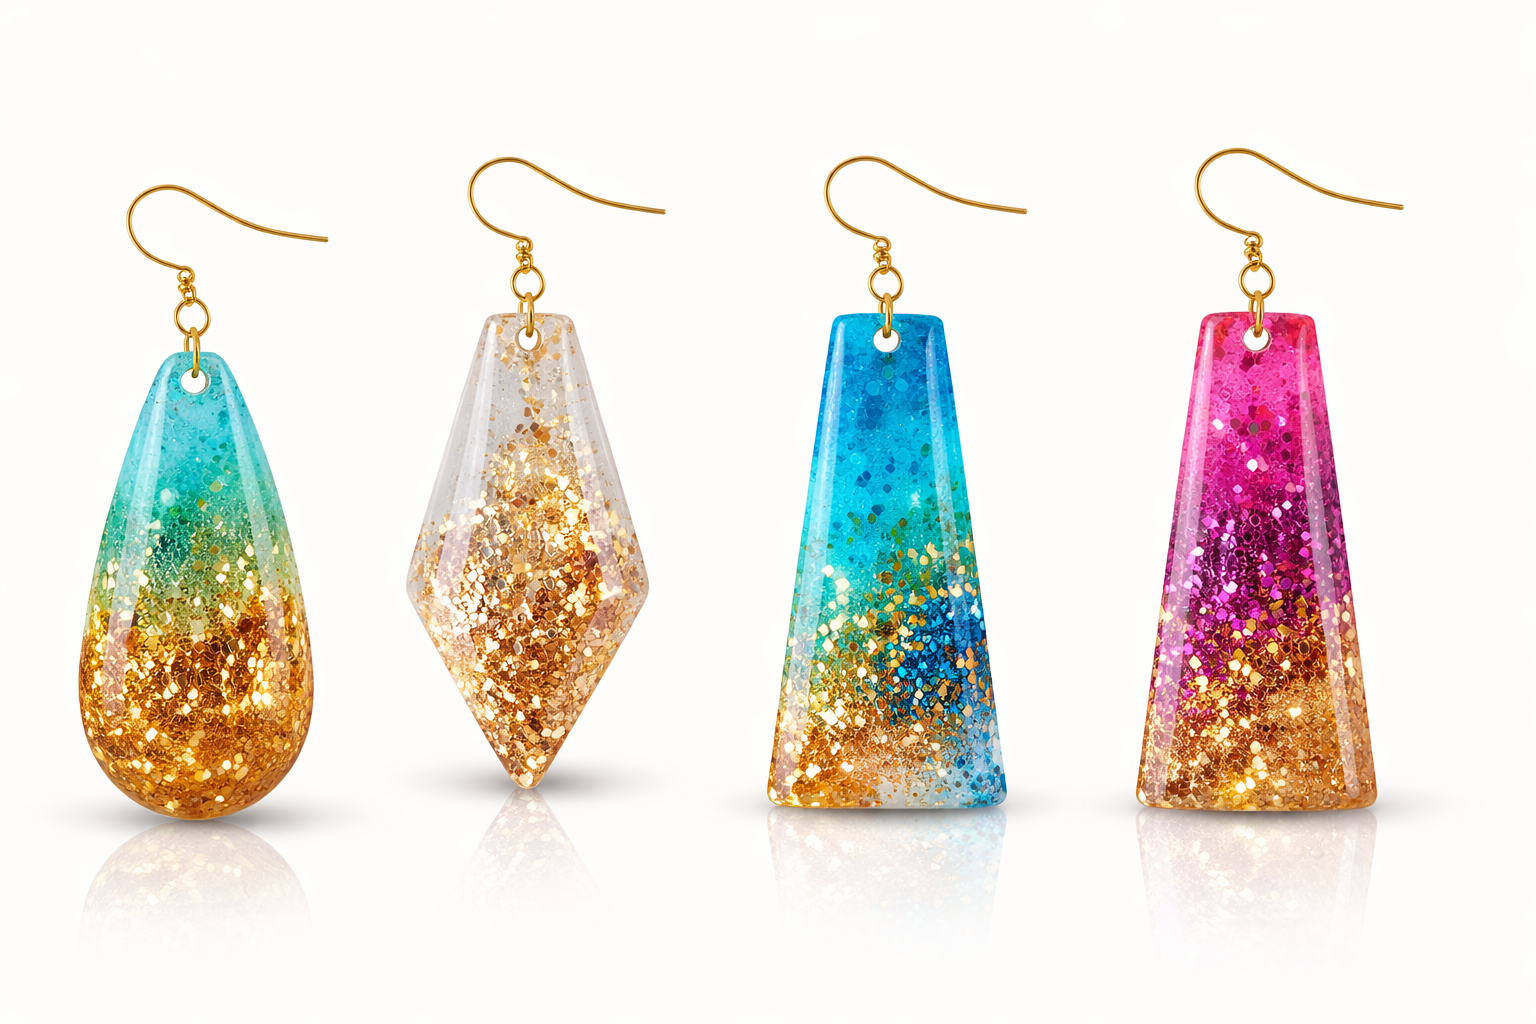
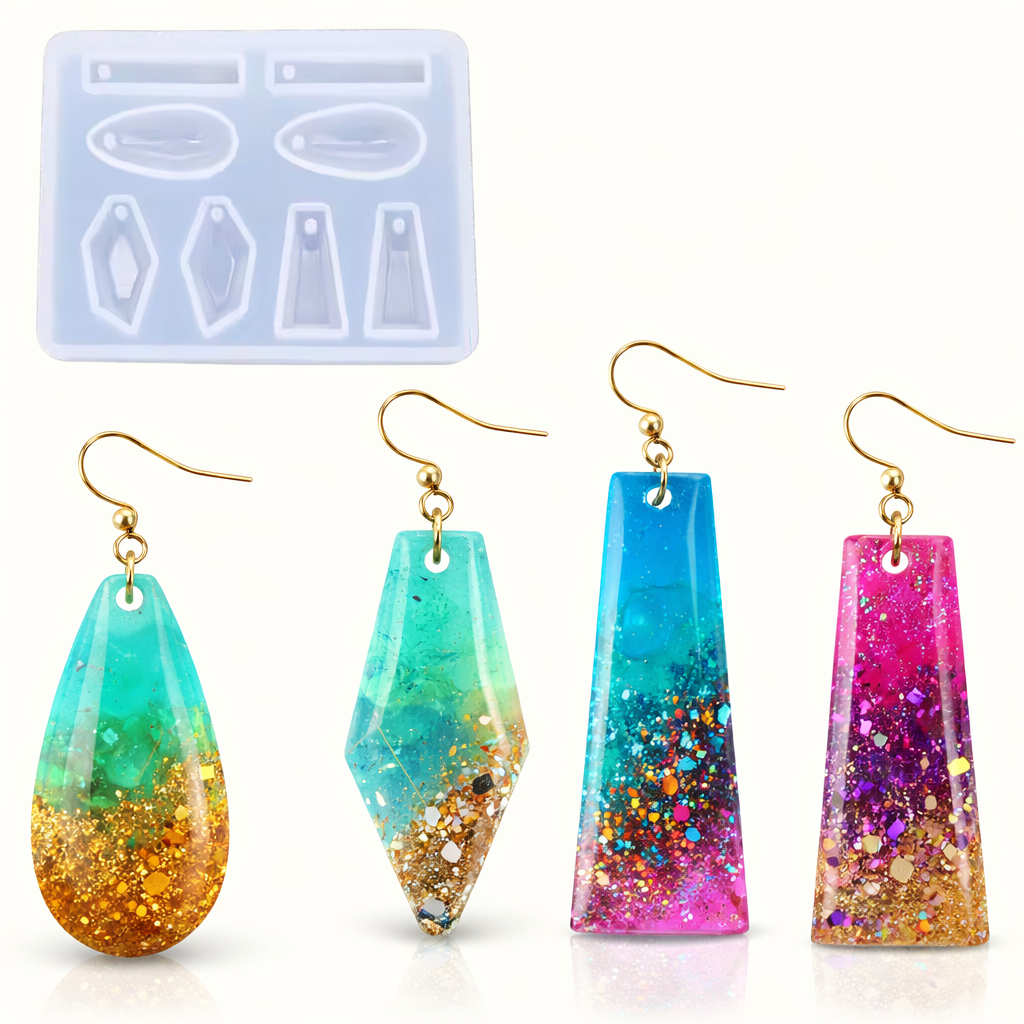
What Can You Create with UV Resin?
UV resin is perfect for small, detailed, and quick DIY projects. It gives a glossy, clear finish and cures instantly under UV light, making it ideal for beginners and hobby creators.
UV Resin vs Epoxy Resin
Understanding the difference helps you choose the right type of resin for your project.
- No mixing required
- Cures in 5–10 minutes
- Very easy to use
- Mixing required
- Cures in 24–48 hours
- Moderate difficulty
- UV → Fast & instant results
- Epoxy → Slow but versatile
- UV → Best for beginners
Safety Tips for UV Resin
UV resin is beginner-friendly, but following a few basic safety steps will help you avoid mistakes and work confidently.
How to Use UV Resin (Step-by-Step Guide)
Follow these simple steps to create beautiful UV resin designs quickly and easily.
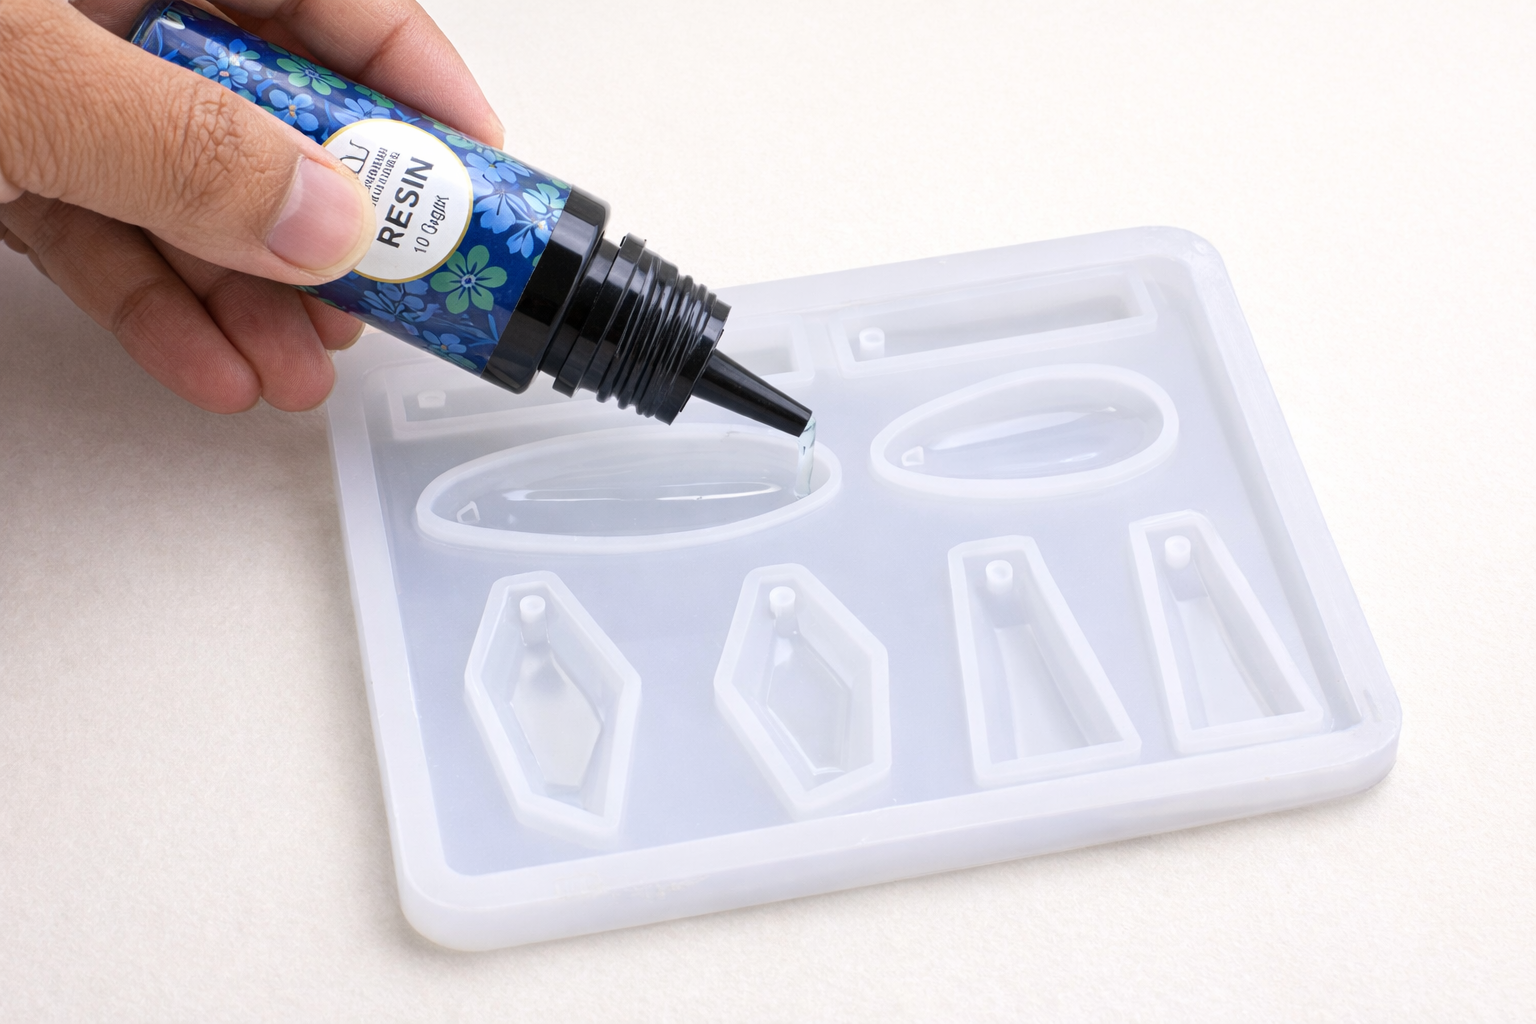
Start by filling your mould carefully. This step sets the base of your design.
Do not overfill
Overfilling can spoil the shape and finishing.
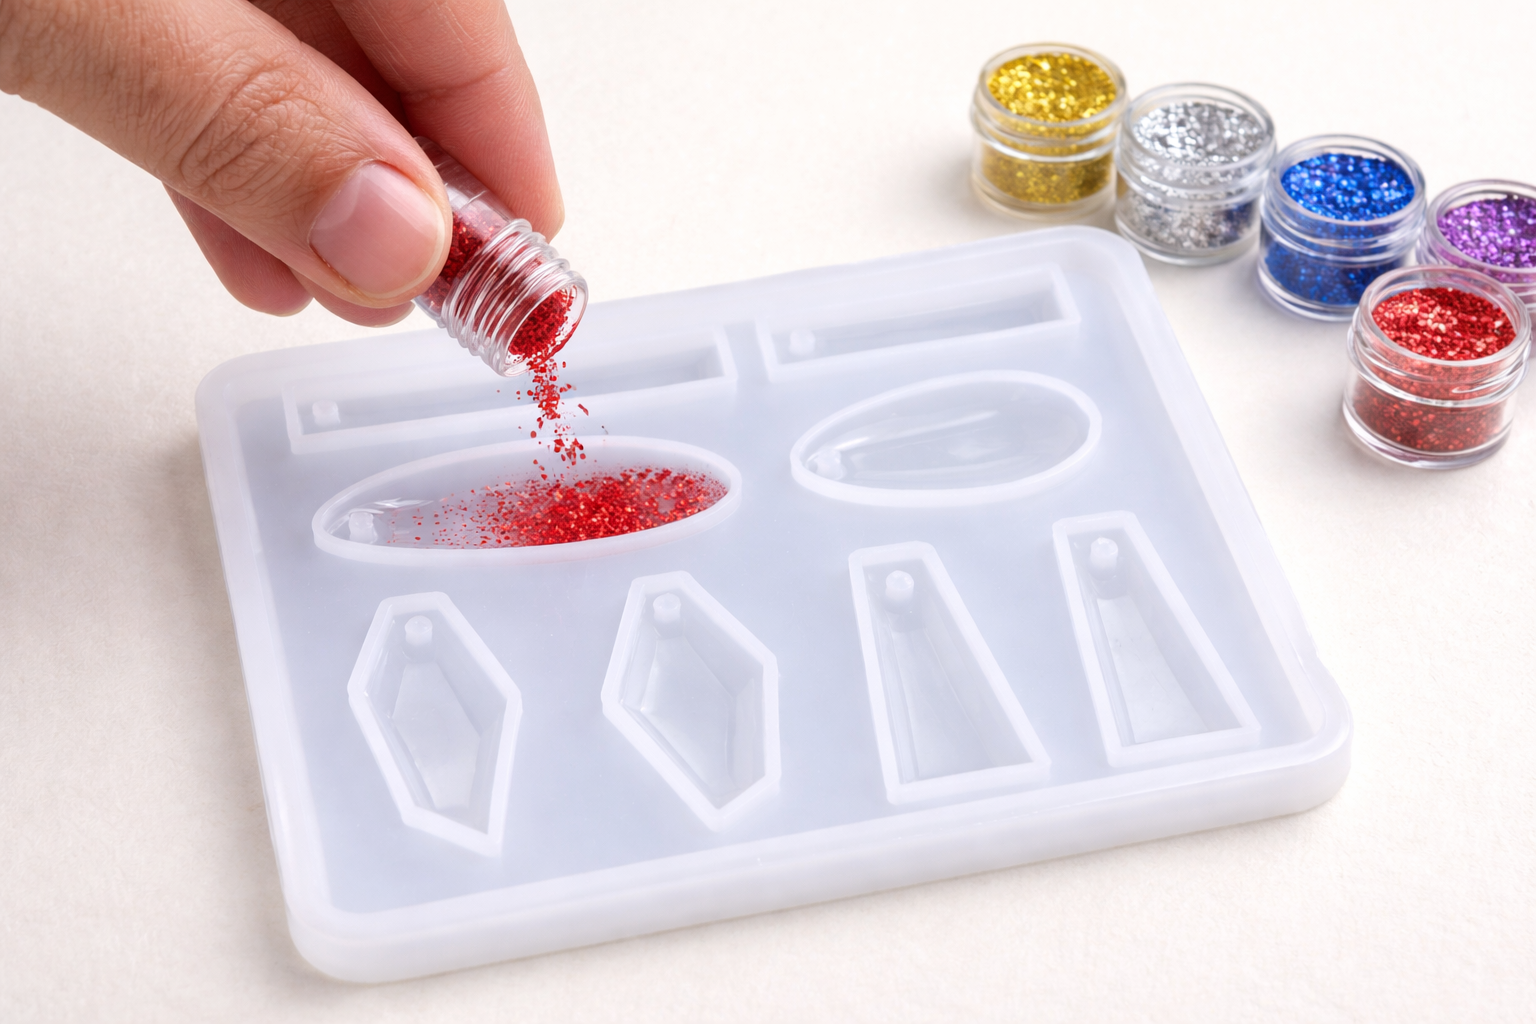
Now it’s time to get creative and design your piece.
Mix or layer for different effects
Less is more — too much glitter can affect clarity.
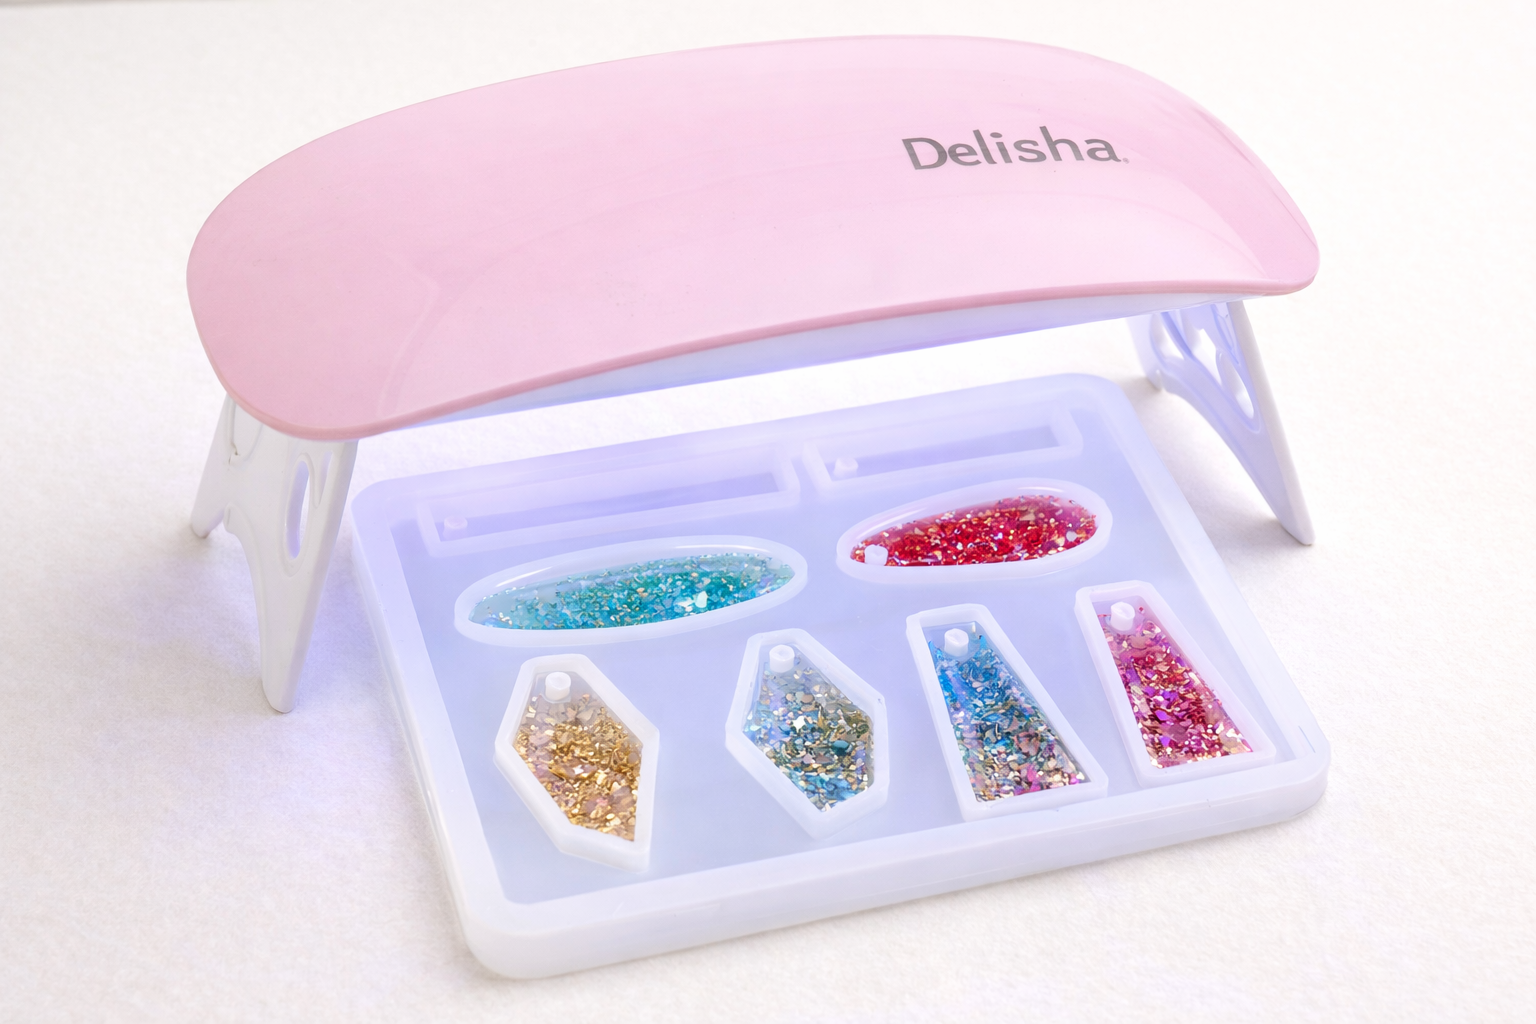
This is where the magic happens — your resin hardens quickly under UV light.
Cure for 5–10 minutes
Start with one cavity first to practice
UV resin curing is fast and happens instantly under UV light.
Once cured, your piece is ready to use or assemble.
Attach hooks or accessories
In just minutes, your resin jewellery is ready!
Common Mistakes & Pro Tips
If you’re new to UV resin art, avoiding small mistakes and following simple tips can make a big difference in your results.
No mixing required — easy to start
Quick results in minutes
Perfect for beginners and hobby lovers
Great for handmade gifts and small business ideas
Frequently Asked Questions (UV Resin)
- Not enough curing
- Thick layers
- Weak UV light
- Slower
- Less consistent
- Avoid skin contact before curing
- Wash hands after use
- Follow basic precautions
- Earrings
- Keychains
- Charms
- Small mould designs
Choose Your Kit
Both kits are beginner-friendly and ship with everything you need to start the same day.
- 300g 3:1 Epoxy Resin
- 25+ Silicone Moulds
- Pigments, Glitters & Tools
- Step-by-step instructions included
- 25g UV Resin included
- UV Lamp + Silicone Moulds
- Colours, Glitters & Accessories
- Ready to use in minutes